
Troubleshooting Connectivity Issues: A Step-by-Step Guide
Network problems can bring your entire day to a halt. A single loose ethernet cable can cause hours of lost productivity and confusion. Most people think it takes complex technical skills to fix these issues, but often the real solution is much simpler and right in front of you.
Table of Contents
- Step 1: Assess Your Current Network Environment
- Step 2: Verify Device Settings And Configurations
- Step 3: Test Physical Connections And Cables
- Step 4: Restart Devices And Network Equipment
- Step 5: Run Diagnostic Tests For Deeper Analysis
- Step 6: Implement Solutions And Confirm Connectivity
Quick Summary
| Key Point | Explanation |
|---|---|
| 1. Assess your network infrastructure | Examine physical connections for loose or damaged cables to prevent connectivity issues. |
| 2. Verify device configurations carefully | Ensure correct settings like IP address, subnet mask, and DNS to facilitate proper network communication. |
| 3. Restart devices systematically | Power off your devices fully and reconnect them to clear temporary errors and reset connections. |
| 4. Conduct thorough diagnostic tests | Use built-in tools to check connectivity metrics such as latency and packet loss for deeper insights. |
| 5. Document changes made to settings | Keep a log of any adjustments to configurations, ensuring effective tracking of troubleshooting efforts. |
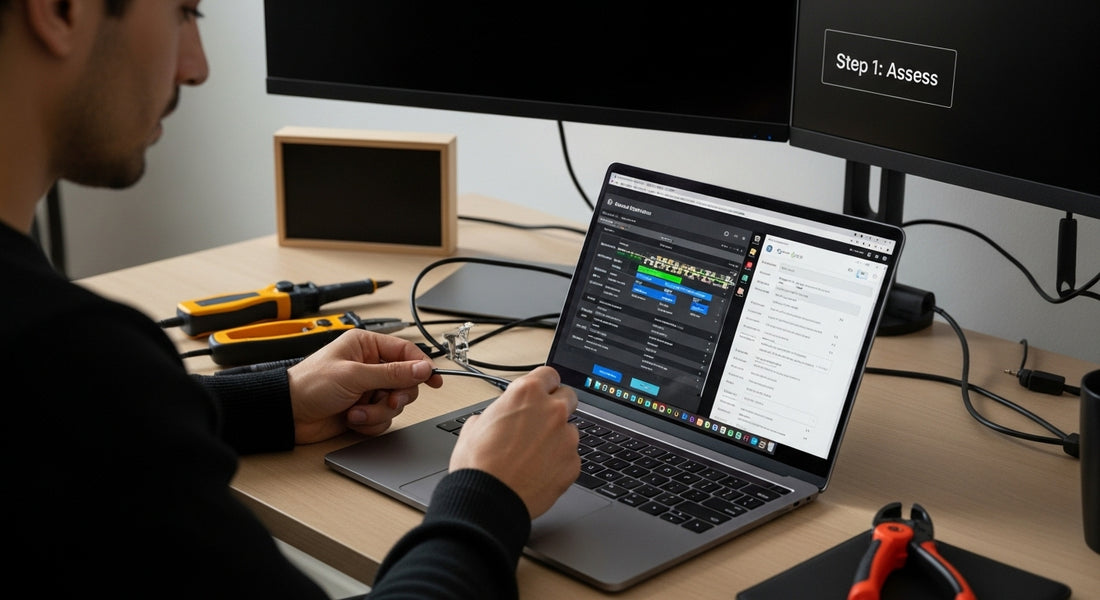
Step 1: Assess Your Current Network Environment
Troubleshooting connectivity issues begins with a systematic approach to understanding your current network environment. Before diving into complex solutions, you need to establish a clear picture of your existing network setup and potential points of failure. This initial assessment is crucial for pinpointing the root cause of connectivity problems and developing an effective resolution strategy.
Start by examining your physical network infrastructure. Check all physical connections carefully, ensuring ethernet cables are securely plugged into routers, switches, and devices. Loose or damaged cables are often overlooked but can cause significant connectivity disruptions. Inspect each connection point for signs of wear, corrosion, or physical damage that might interrupt signal transmission.
Next, evaluate your network devices and their current status. Power cycle your modem and router by unplugging them for approximately 30 seconds before reconnecting. This simple action can resolve many temporary network issues caused by memory cache buildup or minor software glitches. During this process, observe the device indicator lights to understand their operational status. Steady green lights typically indicate normal functioning, while blinking or red lights might signal potential connectivity problems.
According to Carnegie Mellon University’s network troubleshooting guide, verifying network configurations is a critical step in diagnosing connectivity challenges. Use your device’s network settings to confirm the following key details:
- Correct IP address assignment
- Proper subnet mask configuration
- Accurate default gateway settings
- DNS server information
If any of these configurations appear incorrect or inconsistent, they could be preventing successful network communication. Professional technicians recommend documenting these settings before making any changes, allowing you to revert to previous configurations if needed.
Finally, run basic network diagnostic tools available on your operating system. Windows users can utilize the built-in Network Diagnostics tool, while macOS offers Network Utility. These integrated tools can quickly identify connection problems, provide diagnostic information, and sometimes automatically suggest potential fixes. By methodically working through these assessment steps, you create a solid foundation for resolving more complex connectivity issues in subsequent troubleshooting stages.
Step 2: Verify Device Settings and Configurations
After assessing your network environment, the next critical phase in troubleshooting connectivity issues involves meticulously verifying your device settings and configurations. This step is fundamental in isolating potential technical barriers preventing successful network communication. Your goal is to confirm that your device is correctly configured to interact with network resources.
Begin by examining your wireless or ethernet network connection settings. Navigate to your device’s network configuration panel and carefully review each parameter. For wireless connections, verify the network name (SSID) matches the intended network and that you are using the correct authentication method. Incorrect authentication settings can completely block network access, so double-check whether you are using WPA2, WPA3, or another security protocol.
Pay special attention to your IP address configuration. Devices can be set to obtain IP addresses automatically or manually. If you are experiencing persistent connectivity problems, consider switching between automatic and manual IP assignment. When manually configuring IP settings, ensure you input the correct subnet mask, default gateway, and DNS server addresses. Small configuration errors can render your entire network connection inoperable.
According to University of Reading’s network troubleshooting guide, implementing specific diagnostic techniques can help resolve configuration challenges:
- Remove and re-add the network profile
- Toggle wireless connectivity off and on
- Restart the device completely
- Verify username and password configurations
Driver compatibility represents another crucial aspect of device settings. Outdated or corrupted network adapter drivers can significantly disrupt connectivity. Visit your device manufacturer’s website or use the built-in device manager to check for the latest driver updates. Installing the most recent driver version can resolve many underlying configuration conflicts.
Finally, test your connection after making any modifications. Open a web browser and attempt to load multiple websites to confirm stable internet access. If connectivity remains inconsistent, you may need to proceed to more advanced troubleshooting techniques or consider professional technical support. The successful completion of this step involves establishing a stable, authenticated network connection with all necessary configurations correctly implemented.
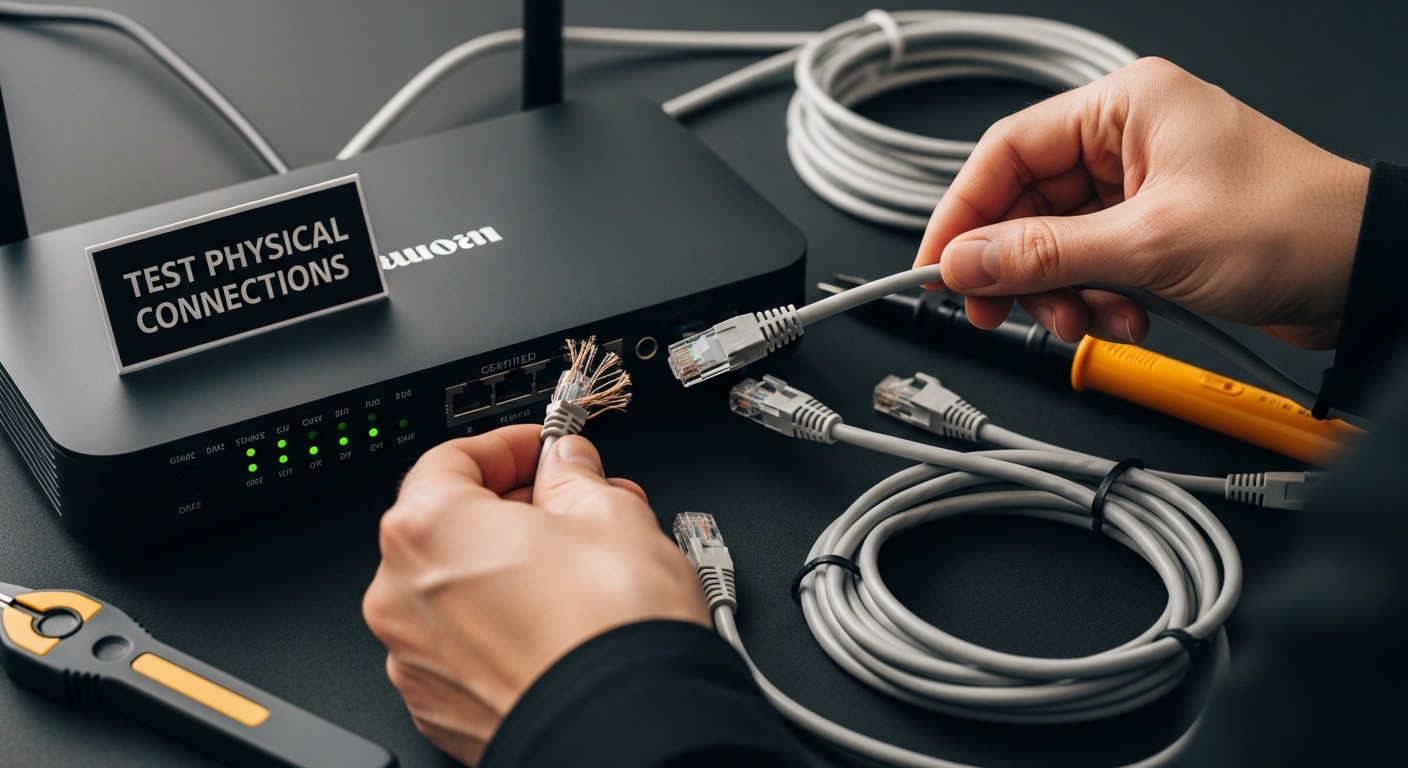
Step 3: Test Physical Connections and Cables
Physical network connections represent the fundamental infrastructure of your connectivity ecosystem. Troubleshooting connectivity issues requires a methodical examination of the tangible components that enable data transmission. Even the smallest physical interruption can completely disable network communication, making this step crucial in diagnosing potential problems.
Begin by conducting a comprehensive visual inspection of all network cables and connection points. Look for visible signs of wear, damage, or stress such as frayed edges, kinks, or bent connectors. Ethernet cables are particularly susceptible to physical degradation, and seemingly minor imperfections can significantly compromise signal quality. Gently wiggle each cable connection to check for looseness, which might indicate a failing connection point or damaged socket.
Next, systematically test each cable and connection using a structured approach. Start by replacing network cables with known functional alternatives. If possible, use cables of different lengths to eliminate the possibility of signal degradation related to cable length. Invest in high-quality, certified network cables that meet current industry standards to ensure optimal signal transmission and reduce potential interference.
According to Carnegie Mellon University’s network troubleshooting guidance, implementing a comprehensive cable testing strategy involves several key actions:
- Disconnect and reconnect network cables after a brief waiting period
- Test connections using alternative network ports
- Verify cable functionality with different devices
- Inspect both ends of the cable for potential damage
Utilize cable testing tools if available. Professional network technicians often employ specialized devices that can precisely measure cable integrity, detect signal loss, and identify potential wiring faults. For home users, a simple cable tester or multimeter can provide basic insights into cable performance. Pay special attention to the quality of crimped ends and connector pins, as these are common failure points in network infrastructure.
Finally, document your findings throughout the testing process. Note which cables or connections demonstrate problems, and consider replacing components that show signs of wear or inconsistent performance. The successful completion of this step involves establishing a reliable, physically sound network connection with verified cable and connector integrity.
Step 4: Restart Devices and Network Equipment
Restarting devices and network equipment represents a fundamental yet powerful troubleshooting technique that can resolve numerous connectivity issues. Many complex network problems can be miraculously solved by a simple restart, clearing temporary system configurations and resetting network interfaces to their default operational state.
Begin the restart process with a systematic approach. Start by shutting down your primary computing device completely, not just putting it into sleep mode. For desktop computers, select the full shutdown option, which clears system memory and resets network adapters. Laptop users should ensure the device is completely powered off, not just closed or in hibernation. Wait approximately 30 seconds after powering down to allow all residual electrical charge to dissipate, which helps clear any temporary network configuration errors.
Next, focus on your network infrastructure equipment. Unplug your modem and router from their power sources, ensuring a complete disconnection. The order matters - first disconnect the router, then the modem. Physical disconnection is more effective than using power buttons, as it guarantees a complete system reset. Allow these devices to remain unplugged for at least one minute, which provides sufficient time for internal memory circuits to clear and reset.
According to Eastern Kentucky University’s Information Technology guidance, restarting network equipment involves a precise sequence:
- Disconnect all network devices from power sources
- Wait 60 seconds before reconnecting
- Plug in the modem first and wait for stable connection indicators
- Reconnect the router and wait for full initialization
- Restart your primary computing device
After reconnecting your network equipment, observe the indicator lights carefully. Steady green lights typically signify a successful reset and proper initialization. Allow several minutes for your network to fully stabilize before attempting to reconnect your devices.
![]() Professional technicians recommend waiting up to five minutes to ensure complete network infrastructure restoration.
Professional technicians recommend waiting up to five minutes to ensure complete network infrastructure restoration.
Finally, test your network connection by opening a web browser or running a network connectivity test. Verify that all devices can successfully connect to the network. If connectivity issues persist after this comprehensive restart process, you may need to proceed to more advanced troubleshooting techniques or consider professional technical support.
Step 5: Run Diagnostic Tests for Deeper Analysis
Deeper network connectivity troubleshooting requires systematic diagnostic testing that goes beyond surface-level observations. Diagnostic tests provide granular insights into network performance, revealing hidden issues that might not be immediately apparent. This step transforms your troubleshooting approach from guesswork to precision-driven investigation.
Begin by utilizing built-in operating system diagnostic tools. Windows users can access the Network Diagnostics utility, while macOS offers Network Utility. These integrated tools perform fundamental connectivity checks, measuring packet loss, latency, and network interface status. Run these diagnostics multiple times to establish consistent performance patterns, as intermittent issues can be challenging to detect in a single test.
Command-line network diagnostic tools offer more sophisticated analysis capabilities. The PING command allows you to test connectivity to specific network destinations, measuring response times and packet transmission success. Use ‘ping 8.8.8.8’ (Google’s public DNS) to verify basic internet connectivity, or test specific websites to isolate potential routing problems. The tracert (Windows) or traceroute (macOS/Linux) commands provide even more detailed network path information, showing each network hop and potential bottlenecks in your connection route.
According to NASA’s network diagnostic resources, comprehensive diagnostic testing should include:
- Measuring round-trip time between devices
- Checking packet loss percentages
- Identifying potential network congestion points
- Verifying DNS resolution capabilities
- Testing download and upload speeds
Consider employing third-party network diagnostic software for more advanced analysis. Tools like Wireshark offer packet-level inspection, allowing you to examine network traffic in extraordinary detail. Professional-grade diagnostic utilities can reveal subtle configuration issues or potential security vulnerabilities that standard operating system tools might miss.
Finally, document your diagnostic test results carefully. Note specific metrics like latency, packet loss, and connection speeds. Compare these results against baseline performance expectations or previous test outcomes.
Below is a summary table of diagnostic tools and their primary uses, organising the testing approaches described in the content for easier reference.
| Tool/Method | Platform | Primary Use | Key Metric Measured |
|---|---|---|---|
| Network Diagnostics | Windows | Basic connectivity check | Connection errors |
| Network Utility | macOS | Network interface and ping testing | Interface status, latency |
| PING command | All (command-line) | Test connectivity to specific destinations | Response time, packet loss |
| tracert/traceroute | Win/macOS/Linux | Analyse network path and potential bottlenecks | Network hops, route |
| Third-party software | All | Advanced packet analysis, deeper inspection | Packet data, traffic details |
| Speed test website | All | Measure internet speed and consistency | Download/upload speed |
Step 6: Implement Solutions and Confirm Connectivity
Implementing solutions and confirming connectivity represents the critical culmination of your troubleshooting journey. This step transforms diagnostic insights into practical actions that resolve network issues, translating technical analysis into tangible improvements. The goal is not just to identify problems but to systematically implement effective solutions and verify their success.
Begin by prioritizing the solutions uncovered during your diagnostic testing. Rank potential interventions based on complexity and likelihood of resolving the connectivity issue. Start with the simplest solutions first, such as updating network adapter drivers, adjusting network configuration settings, or replacing potentially faulty network cables. Incremental problem-solving prevents unnecessary complexity and reduces the risk of introducing additional complications.
Carefully document each solution you implement, noting specific changes made to your network configuration or hardware setup. This documentation serves two critical purposes: creating a troubleshooting record and providing a rollback pathway if a particular solution proves ineffective. Take screenshots of configuration changes, record specific driver versions, and timestamp each intervention to create a comprehensive troubleshooting log.
According to Cisco’s troubleshooting methodology, confirming connectivity involves a structured validation process:
- Test internet connectivity using multiple methods
- Verify connection stability over extended periods
- Check download and upload speeds
- Validate connection across different devices
- Confirm DNS resolution functionality
After implementing each solution, conduct comprehensive connectivity tests. Use multiple verification methods, including web browsing, speed testing websites, and command-line network diagnostic tools. Professional technicians recommend testing connectivity from different devices and network locations to ensure comprehensive resolution. Pay close attention to connection consistency, latency, and overall network performance.
Finally, establish a monitoring protocol to track network performance in the weeks following your troubleshooting efforts. Set up periodic connection tests and be prepared to revisit your solutions if intermittent issues resurface. The successful completion of this step involves not just resolving the immediate connectivity problem, but creating a robust, reliable network environment that maintains stable performance over time.
Stop Network Frustration in Its Tracks with Trusted Replacement Parts
Struggling with persistent connectivity issues uncovered in your troubleshooting journey? Loose cables, damaged connectors, and worn-out parts can bring your devices to a halt, no matter how many times you assess settings or run diagnostics. It is clear from this step-by-step guide that reliable network communication demands quality hardware at every level—from sturdy cables to genuine charging ports. Even a minor fault can waste time and cause needless frustration when all you want is smooth, uninterrupted access.
Restore control with proven solutions. At Buy2fix, you will find an extensive range of mobile phone repair parts and accessories, including certified replacement cables, ports, and connectors tailored to your needs. Each item undergoes rigorous quality checks, and our customer guarantees mean you shop with total confidence. Do not let a simple hardware issue undermine your efforts—explore our full collection of tested components now, and bring your network back to life. Start troubleshooting smarter today by visiting Buy2fix for everything you need to keep your devices connected.
Frequently Asked Questions
What are the first steps in troubleshooting connectivity issues?
Start by assessing your current network environment, including physical connections, device status, and network configurations. Verify connections, power cycle your modem and router, and run basic network diagnostic tools to identify potential issues.
How can I check if my network adapter settings are correct?
Navigate to your device’s network configuration panel. Ensure that the network name (SSID) is correctly set, and verify your IP address, subnet mask, default gateway, and DNS server information are accurate. These settings are essential for successful network communication.
Why is it important to test physical connections and cables?
Physical connections and cables are the foundation of network communication. Damaged or loose cables can lead to significant connectivity disruptions. A thorough inspection and testing of these components can help isolate and resolve potential issues.
What diagnostic tools can I use to analyse my network performance?
You can use built-in operating system tools like Network Diagnostics on Windows or Network Utility on macOS. For more detailed analysis, command-line tools such as PING and traceroute can help measure latency, packet loss, and identify bottlenecks in your connection.
Recommended
- Front Screen Outer Glass Lens with OCA Optically Clear Adhesive for Xi – buy2fix
- Front Screen Outer Glass Lens with OCA Optically Clear Adhesive for Xi – buy2fix
- Front Screen Outer Glass Lens with OCA Optically Clear Adhesive for Xi – buy2fix
- For OPPO R17 / R17 Pro Front Screen Outer Glass Lens with OCA Opticall – buy2fix
Let customers speak for us
Well made part very strong easy to fit great value for the money

Well packed, with fast shipping :)

Exactly what the doctor ordered…great color, comfort, and durability. Trust this watch band!

Brilliant strap, second purchase, bought bracelet before. Excellent value. Thank you

Great item for splitting your Audio signal

Outstanding product!
Next level customer service.

Very satisfied but the delivery needs to get more faster...

Good price,quick delivery

Best phone case ever! This is my second one as I broke my first. Would defo recommend

Great fitting Apple Watch bands

For Apple Watch Ultra 3 / 2 / 1 49mm RedPepper Armor Metal Case Integrated Silicone Watch Band(Steel Black White)

Good price and quick postage

Perfect fit.

Absolutely necessary

Second Purchase and still a very happy customer. Keep up the good work.
