

How to test replacement parts for smartphone repair
TL;DR:
- Testing replacement parts with the Form-Fit-Function framework ensures compatibility and electrical performance before installation. Using essential tools like a multimeter, magnifier, and known-good reference parts validates parts and prevents damage or misdiagnosis. Proper testing and step-by-step swap procedures reduce repair errors, saving time and avoiding unnecessary costs.
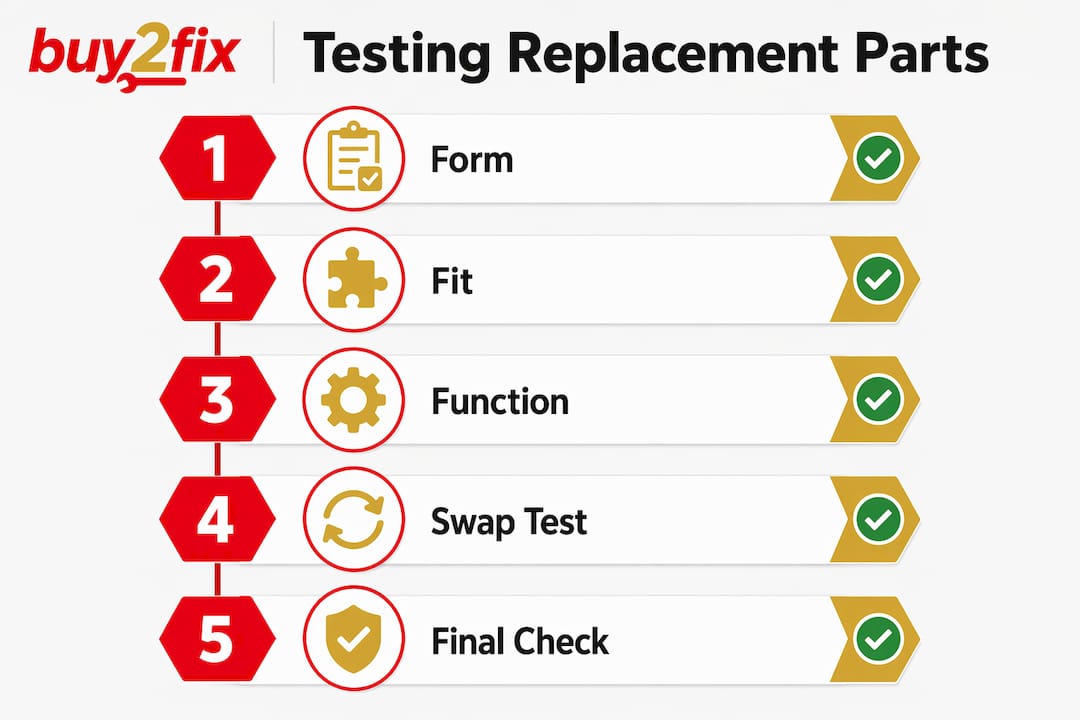
Testing replacement parts is defined as the systematic verification of a component’s form, fit, function, and performance before it is permanently installed in a device. Skip this step and you risk fitting a dead-on-arrival part, masking a deeper circuit fault, or damaging a perfectly good donor component. The Form-Fit-Function (FFF) framework, recognised across electronics engineering and referenced by standards bodies such as JEDEC, gives technicians a structured method to confirm that a replacement part is genuinely compatible and electrically sound. Whether you are a DIY enthusiast replacing an iPhone screen or a professional technician swapping a Samsung Galaxy charging port, knowing how to test replacement parts before committing to installation is the single most reliable way to protect your time, your tools, and your customer’s device.
What tools do you need before testing replacement parts?
The right tools make the difference between a confident diagnosis and an expensive guess. A digital multimeter is the most versatile instrument in any repair kit. It measures resistance, voltage, and continuity, which covers the majority of pre-installation checks for smartphone components. A voltage detector adds a quick non-contact safety check to confirm no residual charge is present before you handle sensitive parts.
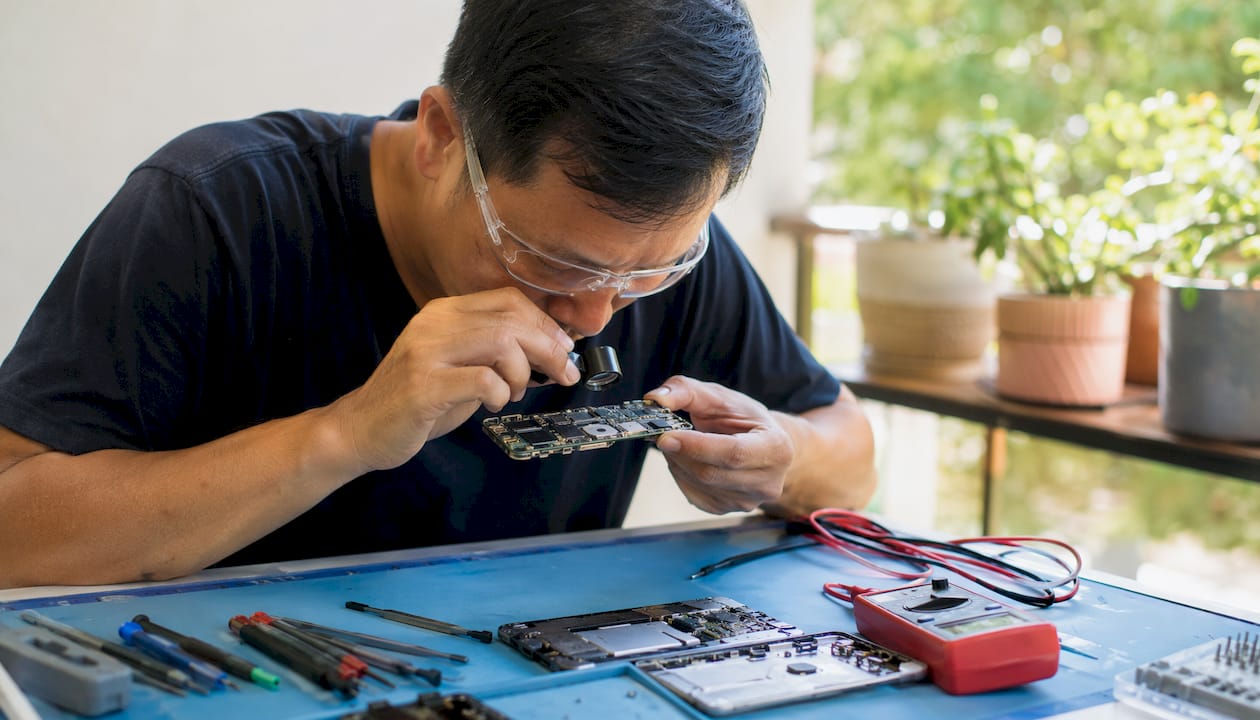
Beyond electrical tools, a magnifier or jeweller’s loupe (at least 10x magnification) lets you inspect solder joints, connector pins, and surface-mount components for physical defects invisible to the naked eye. A known-good reference part, sourced from a verified functional device, is equally important. Without a baseline, you have no reliable point of comparison.
Documentation is a tool in its own right. Photograph the existing component layout before removal, label every connector with masking tape and a marker, and note the part number printed on the original component. This takes under two minutes and prevents a significant proportion of reinstallation errors.
| Tool | Function | Typical use scenario |
|---|---|---|
| Digital multimeter | Measures resistance, voltage, continuity | Checking battery voltage, screen connector continuity |
| Voltage detector | Detects residual charge non-contact | Safety check before handling flex cables |
| Magnifier or loupe | Visual inspection of pins and joints | Spotting bent pins, cracked solder joints |
| Known-good reference part | Baseline for comparison testing | Swap testing to confirm fault location |
| Anti-static wrist strap | Prevents electrostatic discharge | Handling any internal smartphone component |
Pro Tip: Always power the device fully off and disconnect the battery before touching any internal component. A device that appears off but retains battery power can still deliver enough current to damage a flex cable or a new display assembly.
How does the Form-Fit-Function framework verify a replacement part?
The FFF framework gives you three distinct checkpoints, each targeting a different failure mode. Treating them as a sequence rather than a checklist prevents the most common validation errors.
Form covers the physical characteristics of the part: its dimensions, mass, connector type, and material. For a smartphone display assembly, form verification means confirming the panel dimensions match the original to within a fraction of a millimetre, that the flex cable length is identical, and that the connector housing is the correct pitch. A part that looks right in a photograph can still fail form verification when measured with digital callipers.
Fit addresses mechanical interfacing. JEDEC outlines define pin configurations and footprint standards for many electronic components, and JEDEC compliance is the benchmark for confirming that a substitute part will seat correctly without forcing connectors or stressing the PCB. For smartphone repairs, fit verification means checking that screw hole positions align, that adhesive gaskets seat flush, and that no connector requires force to engage.
Function is where electrical testing begins. This stage validates that the part performs to its specified electrical parameters. A bridge rectifier, for example, can be tested in multimeter diode mode: place the probes across each diode junction and confirm forward voltage readings fall within the manufacturer’s specification. A charging IC can be checked for correct resistance values across its power rails before the board is reassembled.
| FFF parameter | What to check | Test method |
|---|---|---|
| Form (dimensions) | Physical size, connector pitch, cable length | Digital callipers, visual comparison |
| Fit (mechanical interface) | Pin alignment, screw positions, gasket seating | Manual fit test, JEDEC datasheet comparison |
| Function (electrical) | Resistance, forward voltage, continuity | Multimeter in resistance or diode mode |
| Function (operational) | Screen response, battery charge rate, signal | Power-on test with device partially assembled |
Pro Tip: Never rely solely on a distributor’s “direct replacement” label. Automatic replacement claims can be inaccurate. Always cross-reference the part number against the original datasheet and run your own FFF checks.
Step-by-step guide to component swap testing
Component swap testing is a diagnostic confirmation method, not a repair technique. Its purpose is to isolate a faulty component by substituting it with a known-good part and observing whether the fault clears. Done correctly, it eliminates guesswork and gives you a reproducible, documented diagnosis.
Before you swap anything, verify that the donor part comes from a device confirmed to be fully functional. A donor component pulled from another faulty handset introduces a second variable and makes accurate diagnosis nearly impossible. Faulty donor parts can also damage the replacement component you are trying to validate.
The procedure runs as follows:
-
Document the baseline fault. Record exactly what the device does and does not do. Note error codes, symptoms, and the conditions that trigger the fault. A written or photographed record is your reference point throughout the process.
-
Verify the donor part. Confirm the known-good component works correctly in its original device before removing it. This step is non-negotiable.
-
Swap one component at a time. Swapping one part at a time is the core discipline of this method. Replacing multiple components simultaneously destroys diagnostic accuracy because you cannot attribute the outcome to a specific part.
-
Reproduce the fault condition. Power the device on and attempt to trigger the original fault. If the fault clears, the swapped component is the likely cause. If the fault persists, the original part is not responsible.
-
Reinstall the original part and retest. Reinstalling the original faulty part after a successful swap confirms the diagnosis. If the fault returns, you have eliminated installation error and wiring issues as variables. Skipping this step is one of the most common technician errors and weakens diagnostic confidence significantly.
-
Check circuit integrity before fitting the new part permanently. A misdiagnosis can cause a new replacement to fail immediately because an unaddressed circuit fault destroys the incoming component. Run continuity checks on the relevant circuit paths before final installation.
Pro Tip: Use a phone replacement parts checklist to track each swap step. A written record prevents you from losing track of which parts have been tested and in what sequence, particularly when multiple faults are present.
Advanced testing techniques for electronic components
Basic continuity testing confirms a circuit path exists. It does not confirm that the path performs correctly under load or at the frequencies a smartphone operates at. Electrical continuity alone misses latent defects that only appear under real operating conditions.
A network analyser measures impedance and signal integrity across a frequency range. For high-frequency components such as antenna modules, RF filters, and power management ICs, impedance deviation from specification indicates a defective part even when continuity tests pass. This tool is more common in professional repair labs than in home workshops, but its value for validating critical components is significant.
Thermal imaging identifies hotspots under load. A component drawing excessive current produces localised heat that a thermal camera detects within seconds of power-on. This technique is particularly useful for battery management circuits and charging modules, where a failing component may pass all static tests but overheat during normal operation.
Additional advanced methods include:
- Voltage stress testing. Apply a controlled voltage slightly above the component’s rated operating voltage using a programmable bench power supply. Parts with marginal insulation or internal defects fail under stress before they fail in service.
- Dielectric strength testing. Confirms insulation integrity between conductors. Relevant for flex cables and display assemblies where physical damage may not be visible.
- Vibration and shock testing. Mechanical reliability checks confirm that solder joints and connector crimps survive the physical stresses of daily smartphone use. Specialist equipment is required, but professional repair centres handling high volumes benefit from this validation.
- Certification verification. For critical parts, independent lab testing including spectrochemical analysis and certification checks against recognised registrars confirms that materials and construction meet specification.
Pro Tip: If you do not have access to a network analyser, a step-by-step testing guide for common smartphone components can help you identify which advanced checks are most relevant for the specific part you are validating.
Common mistakes when testing and installing replacement parts
The most damaging assumption in smartphone repair is that a new part is a functional part. New replacement parts should always be tested for electrical continuity and function using a multimeter before permanent installation. Dead-on-arrival rates for third-party components are real, and fitting an untested part wastes both time and the cost of labour.
The five mistakes that cause the most failed repairs are:
- Using an unverified donor part. Pulling a component from a device that “seemed to work” is not the same as confirming it is fully functional. Always verify the donor device before extracting any part.
- Swapping multiple components at once. This makes it impossible to identify which part resolved or caused the fault.
- Skipping the reinstall-and-retest step. Without reinstalling the original part to confirm the fault returns, you cannot rule out installation error as the cause of the original symptom.
- Ignoring part orientation and polarity. Incorrect orientation of a battery connector or display flex can cause immediate damage to the new part and to the board.
- Overlooking documentation. Failing to photograph connector positions and label cables before disassembly leads to reassembly errors that mimic component faults.
Pro Tip: When multiple faults are present simultaneously, prioritise the most likely root cause and test for it first. Addressing a secondary fault before the primary one often results in replacing parts that were never actually defective.
Key takeaways
Systematic pre-installation testing using the Form-Fit-Function framework, component swap testing, and circuit integrity checks is the most reliable method for confirming replacement part quality and preventing failed smartphone repairs.
| Point | Details |
|---|---|
| Test before you install | Always verify continuity and function with a multimeter before fitting any new part permanently. |
| Use the FFF framework | Check form, fit, and function in sequence to catch physical, mechanical, and electrical faults. |
| Swap one part at a time | Replacing multiple components simultaneously makes accurate fault diagnosis impossible. |
| Verify your donor part | Only use known-good components from confirmed functional devices to avoid compounding faults. |
| Reinstall the original to confirm | Refitting the original faulty part and reproducing the fault eliminates installation error as a variable. |
Why I think “replace and hope” is the most expensive habit in repair
The mindset that kills repair confidence is the assumption that fitting a new part will automatically fix the problem. I have seen technicians spend more on replacement screens, charging ports, and battery assemblies in a single week than they would have spent in a month if they had tested methodically from the start.
The shift that changes everything is treating every repair as a diagnostic exercise first and a parts-fitting exercise second. When you document the fault, verify the donor, swap one component, and confirm the diagnosis by reinstalling the original, you stop guessing. You start knowing. That distinction matters enormously when a customer is waiting and your professional reputation is on the line.
The tools required for rigorous testing are not expensive. A decent digital multimeter costs less than a single premium display assembly. The discipline required costs nothing at all. What I find most encouraging is that technicians who build testing into their standard workflow consistently report fewer comebacks, fewer wasted parts, and greater confidence when quoting repair times. The skill compounds quickly once you practise it deliberately.
Emerging tools like affordable USB thermal cameras and entry-level bench power supplies are making advanced testing accessible to home workshops that previously could not justify the cost. The gap between DIY and professional-grade diagnostics is narrowing. The technicians who invest in testing skills now will be significantly ahead when those tools become standard.
— Adewale
Quality parts and testing support from Buy2fix
Buy2fix supplies replacement parts for iPhone, Samsung Galaxy, Huawei, Xiaomi, OPPO, and a broad range of other devices, with quality checks carried out before dispatch. Every order ships free to UK mainland addresses, and eligible items carry warranty support backed by a 30-day return policy. For technicians and DIY repairers who want to source parts with confidence, the Buy2fix repair parts catalogue covers screens, batteries, charging assemblies, and more. The Buy2fix blog also publishes practical guidance on sourcing repair parts and identifying genuine components, giving you the technical context to make informed purchasing decisions alongside your testing process.
FAQ
What does testing replacement parts involve?
Testing replacement parts involves verifying a component’s physical dimensions, mechanical fit, and electrical performance before permanent installation. The Form-Fit-Function framework provides a structured method for this verification.
Can I test a new part with just a multimeter?
A multimeter confirms continuity, resistance, and voltage, which covers most basic pre-installation checks. Advanced defects in high-frequency components require additional tools such as a network analyser or thermal camera.
How do I know if my donor part is genuinely good?
Confirm the donor device powers on and operates normally across all functions before removing any component. A donor part from a device that “mostly worked” is not a reliable baseline for swap testing.
Why should I reinstall the original faulty part after a successful swap?
Reinstalling the original part and reproducing the fault confirms that the replacement component, not an installation error or wiring issue, was responsible for the fix. Skipping this step leaves diagnostic uncertainty.
How do I avoid fitting a dead-on-arrival replacement part?
Test every new part for continuity and basic electrical function with a multimeter before installation. New parts can arrive non-functional, and a two-minute pre-installation check prevents the cost and time of a full disassembly and reassembly.
Recommended
Let customers speak for us
For Samsung Galaxy A26 SM-A266B Original Earpiece Speaker with Cable

Very good communication throught. Good product

Well made part very strong easy to fit great value for the money

Well packed, with fast shipping :)

Exactly what the doctor ordered…great color, comfort, and durability. Trust this watch band!

Brilliant strap, second purchase, bought bracelet before. Excellent value. Thank you

Great item for splitting your Audio signal

Outstanding product!
Next level customer service.

Very satisfied but the delivery needs to get more faster...

Good price,quick delivery

Best phone case ever! This is my second one as I broke my first. Would defo recommend

Great fitting Apple Watch bands

For Apple Watch Ultra 3 / 2 / 1 49mm RedPepper Armor Metal Case Integrated Silicone Watch Band(Steel Black White)

Good price and quick postage

