

How to Replace LCD Screen: Step-By-Step Easy Guide

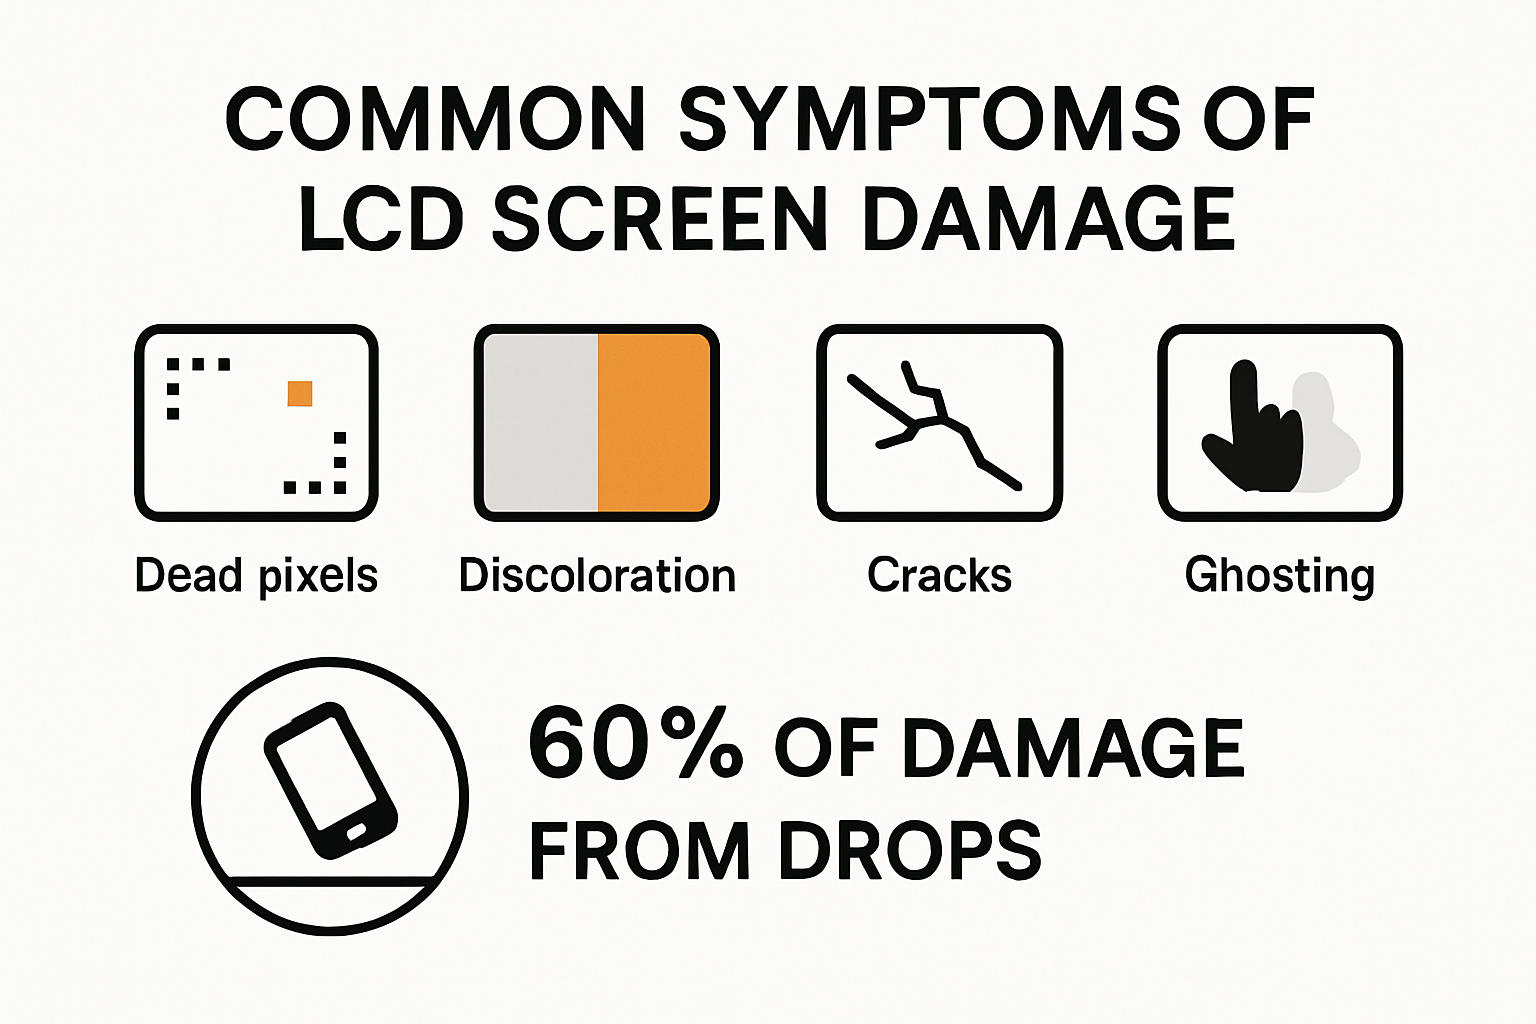
LCD screens keep your gadgets alive whether it’s a laptop or a smartphone. About 60 percent of screen damage comes from accidental drops or impacts and not from faulty manufacturing. Most people think replacing an LCD screen is a job only for someone with a technical background but anyone with steady hands and the right tools can tackle this process step by step.
Table of Contents
Quick Summary
| Takeaway | Explanation |
| Identify screen damage early | Regularly check for cracks, pixel defects, or discoloration to determine the need for replacement. |
| Use high-quality replacement parts | Choose compatible components from reputable sources to ensure optimal performance and longevity. |
| Follow a systematic replacement process | Prepare adequately, documenting steps and components for successful disassembly and reassembly. |
| Conduct thorough post-replacement testing | Test display quality, touch sensitivity, and functionality under various conditions to confirm proper installation. |
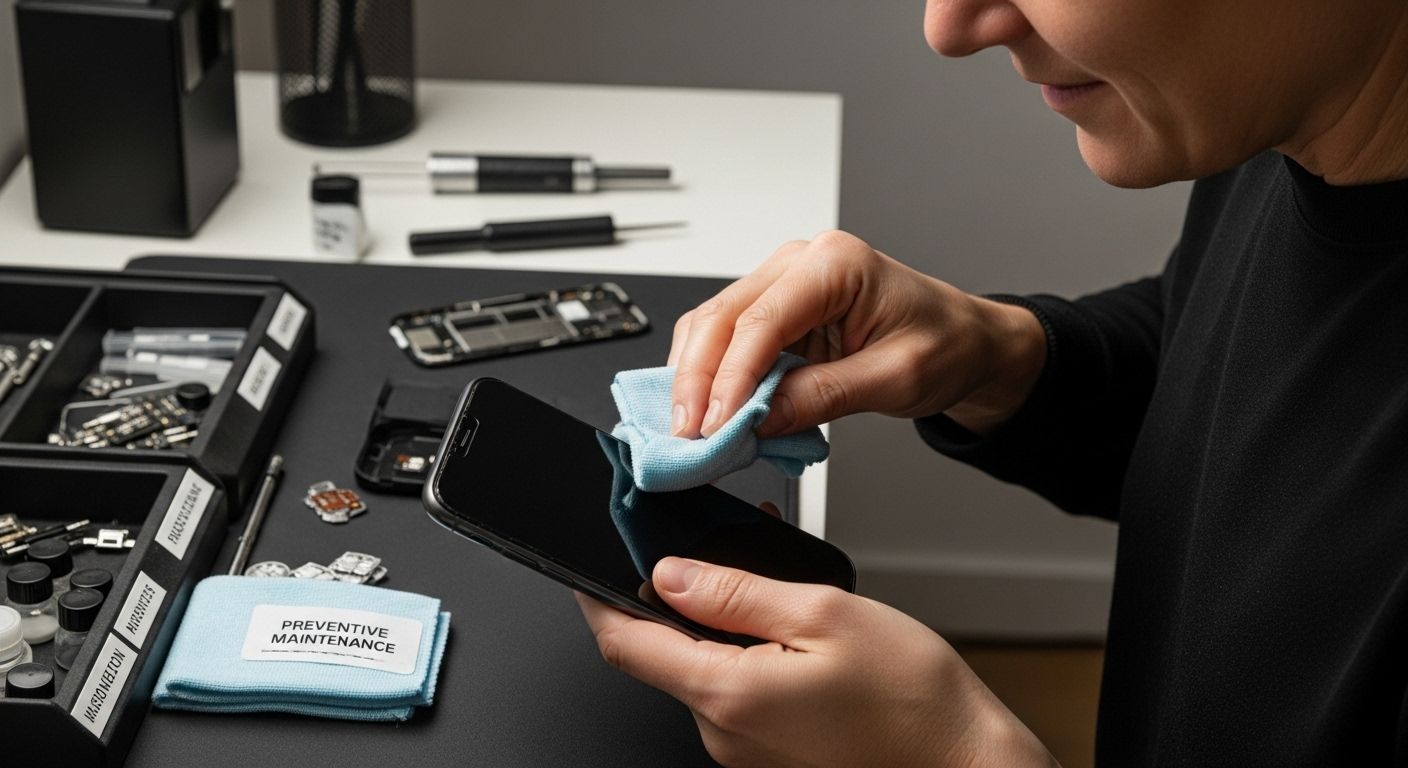
| Practice preventive maintenance | Regularly clean the screen and maintain optimal environmental conditions to prolong the lifespan of the LCD. |
Understanding LCD Screen Damage and Symptoms
LCD screens are sophisticated technological components that can develop various issues over time, impacting device functionality and visual performance. Understanding the nuanced symptoms of screen damage is crucial for effective troubleshooting and determining whether a replacement is necessary.
Common Types of LCD Screen Damage
LCD screens are vulnerable to multiple forms of damage that can compromise their performance. Physical impacts, temperature variations, and manufacturing defects can contribute to screen deterioration. Research from Electronics Repair International indicates that approximately 60% of smartphone screen damages result from accidental drops or impacts.
Pixel Defects represent one of the most prevalent LCD screen issues. According to Wikipedia’s technical documentation, pixel defects can manifest in several distinct ways:
-
Dark Dot Defects: Pixels permanently remain black, creating visible dark spots
-
Bright Dot Defects: Pixels stay continuously illuminated, appearing as bright white or coloured points
-
Partial Sub-pixel Defects: Individual colour sub-pixels malfunction, causing colour distortion
Identifying Screen Degradation Symptoms
Recognising potential LCD screen damage requires careful observation of specific visual indicators. Professional technicians recommend examining screens under various lighting conditions and display states to accurately assess potential issues.
Image persistence represents another critical diagnostic factor. Technical research reveals that this phenomenon occurs when unwanted visual information remains temporarily visible, often manifesting as ghosting or retained images from previous screen states. While sometimes transient, persistent image retention might signal underlying screen deterioration.
Temperature sensitivity significantly impacts LCD performance. Extreme environmental conditions can dramatically affect screen functionality. Low temperatures typically result in reduced brightness and slower response times, whereas high temperatures can cause contrast reduction and potential permanent damage.
Advanced Diagnostic Considerations
Beyond visible symptoms, advanced screen issues like clouding or mura can emerge. Technical studies describe mura as uneven luminance patches most noticeable in dark screen areas. These subtle defects often require professional assessment and might necessitate complete screen replacement.
Key diagnostic indicators suggesting potential LCD screen replacement include:
-
Persistent discoloration or uneven screen illumination
-
Multiple dead or stuck pixels
-
Touch responsiveness inconsistencies
-
Visible physical cracks or structural damage
-
Recurring image retention or ghosting effects
Understanding these symptoms empowers users to make informed decisions about screen repair or replacement, potentially saving time and resources in device maintenance.
To help readers quickly recognise different types of LCD screen damage, the following table summarises the most common defects, their visual symptoms, and possible causes based on information in the article.
| Type of Defect | Visual Symptom | Typical Cause |
| Dark Dot Defect | Pixels remain permanently black | Pixel malfunction, impact |
| Bright Dot Defect | Continuously illuminated pixel spots | Pixel malfunction, factory |
| Partial Sub-pixel Defect | Distorted or incorrect colours | Sub-pixel failure |
| Image Persistence | Ghosting/retained previous images | Prolonged static display |
| Clouding/Mura | Uneven luminance, patchy dark areas | Manufacturing or aging |
| Discolouration | Areas of off-colour screen | Damage/temperature/extreme |
| Physical Cracks | Visible screen cracks | Accidental impact |
Essential Tools and Quality Replacement Parts
Successful LCD screen replacement requires precision, expertise, and most importantly, the right set of tools and high-quality replacement components. Professional repair technicians understand that selecting appropriate equipment and genuine parts is fundamental to achieving a successful repair outcome.
Professional Toolkit for LCD Screen Replacement
Equipping yourself with a comprehensive toolkit is the first step towards effective screen replacement. Research from University of North Texas emphasizes the critical importance of investing in professional-grade tools that ensure safe and precise electronic repairs.
Essential tools for LCD screen replacement include:
The essential toolkit for LCD screen replacement includes several professional tools. The table below lists each tool and describes its primary use as discussed in the article.
| Tool Name | Purpose/Use |
| Digital Soldering Iron | Provides precise temperature control for connections |
| Rework Station | Enables advanced component removal and installation |
| Anti-Static Wrist Strap | Prevents electrostatic discharge damaging components |
| Precision Screwdriver Set | Fits various screw types and sizes in devices |
| Tweezers | Handles small, delicate electronic parts safely |
| Multimeter | Tests continuity and diagnoses electronic issues |
-
Digital Soldering Iron: Provides precise temperature control for delicate electronic connections
-
Rework Station: Enables professional-level component removal and installation
-
Anti-Static Wrist Strap: Prevents electrical discharge that could damage sensitive electronic components
-
Precision Screwdriver Set: Includes multiple sizes and types for various device models
-
Tweezers: Non-conductive, fine-tipped tweezers for handling small components
-
Multimeter: For testing electrical continuity and diagnosing potential issues
Quality Replacement Part Selection
Scientific Research Publishing highlights that successful LCD screen replacement involves understanding and selecting appropriate replacement components. Critical parts to consider include:
-
Integrated circuits
-
Capacitors
-
Transistors
-
Display panel assemblies
-
Flex cables and connectors
Professional technicians recommend sourcing replacement parts from reputable manufacturers that provide precise specifications matching the original device components. Common Good Ventures suggests evaluating replacement parts based on compatibility, quality, and manufacturer warranty.
Ensuring Repair Quality and Performance
Beyond tools and parts, successful LCD screen replacement requires a systematic approach. Careful component handling, static electricity management, and precise installation techniques are crucial. Technicians must follow manufacturer guidelines, use appropriate protective equipment, and work in a clean, well-lit environment.
Key considerations when selecting replacement parts include:
-
Exact model compatibility
-
Original manufacturer specifications
-
Warranty coverage
-
Performance ratings
-
Material quality
While professional-grade tools and high-quality replacement parts represent an initial investment, they significantly reduce the risk of further damage and ensure optimal device performance. Professionals and DIY enthusiasts alike benefit from a methodical, well-equipped approach to LCD screen replacement.
Step-By-Step LCD Screen Replacement Process
Replacing an LCD screen requires methodical precision and careful attention to detail. Professional technicians and DIY enthusiasts must follow a structured approach to ensure successful screen replacement without causing additional damage to the device.
Pre-Replacement Preparation
OLPC Technical Documentation emphasizes the importance of thorough preparation before beginning the replacement process. Critical preparatory steps include:
-
Gathering all necessary tools and replacement parts
-
Working in a clean, well-lit workspace
-
Grounding yourself to prevent electrostatic discharge
-
Documenting the device’s current state through photographs
-
Backing up all critical data
Careful documentation serves as a crucial reference point during reassembly. Optoelectronics Wiki from University of California recommends creating a systematic approach to disassembly, including:
-
Organizing removed screws in a magnetic parts tray
-
Labeling connectors and components
-
Keeping track of screw sizes and positions
Systematic Disassembly Process
Professional screen replacement follows a precise sequence of steps. Granville Schools’ Technology Guide outlines a comprehensive disassembly method:
-
Power down and disconnect the device completely
-
Remove external protective cases
-
Carefully remove protective screw covers
-
Gently pry off the device bezel
-
Disconnect internal ribbon cables
-
Remove mounting brackets holding the screen
-
Carefully extract the damaged LCD screen
Critical safety considerations during disassembly include:
-
Using appropriate pressure to avoid additional damage
-
Working on a flat, static-free surface
-
Using anti-static tools and wrist straps
-
Maintaining a methodical and patient approach
Screen Installation and Final Verification
Installing the new LCD screen requires equally careful attention. Technicians must ensure:
-
Perfect alignment of the new screen
-
Proper connection of all ribbon cables
-
Secure attachment of mounting brackets
-
Careful reassembly of the device bezel
-
No loose components or connections
Final verification steps include:
-
Powering on the device
-
Checking screen responsiveness
-
Testing display quality
-
Verifying touch functionality
-
Confirming complete system operation
Successful LCD screen replacement demands technical skill, patience, and a methodical approach. While challenging, following these structured steps can help both professionals and enthusiasts achieve a successful repair, restoring device functionality and extending its useful life.
The LCD screen replacement process involves several systematic steps. The following table breaks down each phase and its main activities to guide readers through the procedure.
| Step | Main Activities/Description |
| Pre-Replacement Preparation | Gather tools/parts, work area setup, grounding, documentation, backup |
| Systematic Disassembly | Power off, remove cases/covers, disconnect cables, extract old screen |
| Screen Installation | Align new screen, connect cables, attach brackets, reassemble bezel |
| Final Verification & Testing | Power on, test display and touch, check full system operation |
Tips for Testing, Troubleshooting, and Preventing Issues
After successfully replacing an LCD screen, thorough testing and proactive maintenance are crucial to ensuring long-term device performance and preventing future issues. Professional technicians emphasize a comprehensive approach to post-replacement evaluation and ongoing screen care.
Comprehensive Screen Testing Procedures
Monitor Repair FAQ recommends a systematic testing approach that goes beyond basic visual inspection. Critical evaluation parameters include:
-
Screen size and display geometry
-
Brightness and color consistency
-
Display stability
-
Edge geometry and linearity
-
Scan rate performance
-
Touch responsiveness
-
Color calibration accuracy
-
Potential ghosting or image retention
Technicians should conduct multiple tests under different lighting conditions and display states to ensure comprehensive functionality. This involves:
-
Running full-screen colour tests
-
Checking pixel uniformity
-
Verifying touch sensitivity across entire screen surface
-
Testing display performance at various brightness levels
Troubleshooting Common Post-Replacement Issues
Even with careful installation, certain issues might emerge after LCD screen replacement. Key troubleshooting strategies include:
-
Checking all cable connections
-
Verifying driver compatibility
-
Performing system software updates
-
Resetting device display settings
-
Examining potential electrical connection problems
Warning Signs requiring immediate attention:
-
Intermittent display flickering
-
Unexpected colour distortions
-
Unresponsive touch interfaces
-
Partial screen blackouts
-
Unusual screen artifacts
Preventive Maintenance and Care
Repair Technology Resources highlight essential maintenance practices for prolonging LCD screen lifespan:
-
Regular gentle cleaning using microfibre cloths
-
Avoiding direct sunlight exposure
-
Maintaining consistent ambient temperatures
-
Using protective screen covers
-
Handling devices with clean, dry hands
-
Avoiding excessive pressure on screen surfaces
Additional preventive measures include:
-
Implementing software screen savers
-
Adjusting screen brightness to optimal levels
-
Avoiding extreme environmental conditions
-
Periodic professional inspection
By adopting a proactive approach to screen maintenance and conducting thorough post-replacement testing, users can significantly extend their device’s operational life and maintain optimal display performance. Professional-level care transforms screen replacement from a simple repair into a comprehensive device rejuvenation process.
Frequently Asked Questions
How can I identify if my LCD screen needs replacement?
To determine if your LCD screen requires replacement, look for signs such as cracks, dead or stuck pixels, image ghosting, discolouration, and inconsistent touch responsiveness. Regular checks under different lighting conditions can also help identify potential degradation symptoms.
What tools do I need to replace an LCD screen?
Essential tools for replacing an LCD screen include a digital soldering iron, precision screwdriver set, tweezers, multimeter, anti-static wrist strap, and a rework station. These tools ensure safe and precise handling during the replacement process.
What quality should I look for in replacement LCD screens?
When selecting a replacement LCD screen, prioritise compatibility with your device model, original manufacturer specifications, warranty coverage, and performance ratings. Sourcing parts from reputable manufacturers is crucial for optimal device performance and longevity.
What steps should I follow for LCD screen replacement?
The basic steps for replacing an LCD screen include: preparing the workspace and tools, systematically disassembling the device to remove the old screen, installing the new screen with careful alignment and connections, and conducting final verification tests to ensure the display is functioning properly.
Ready to Replace Your Damaged LCD? Find Everything You Need Here
Have you discovered a cracked screen, pixel issues, or unresponsive touch on your device? When DIY repair meets the challenge of sourcing reliable parts, the hardest part can be finding components you can truly trust. Your time and devices are too valuable for low-quality replacements that risk poor performance or future problems. That is why, as highlighted throughout this guide, the right tools, genuine LCD screens, and precise compatibility make all the difference.
Put your new confidence into action. With Buy2fix, you have direct access to a full range of high-quality LCD screens, display assemblies, flex cables, and all essential replacement parts for iPhone, Samsung, Huawei, and more. Benefit from strict quality testing and fast, free UK mainland delivery. Professionals and DIYers alike turn to us for dependable mobile phone repair parts. Visit Buy2fix now to find the exact LCD screen you need, explore our mobile phone parts and accessories, or speak with our team for support. Secure your replacement today and put your device back in top condition—no more waiting, no more worrying about faulty parts.
Recommended
Let customers speak for us
For Samsung Galaxy A26 SM-A266B Original Earpiece Speaker with Cable

Very good communication throught. Good product

Well made part very strong easy to fit great value for the money

Well packed, with fast shipping :)

Exactly what the doctor ordered…great color, comfort, and durability. Trust this watch band!

Brilliant strap, second purchase, bought bracelet before. Excellent value. Thank you

Great item for splitting your Audio signal

Outstanding product!
Next level customer service.

Very satisfied but the delivery needs to get more faster...

Good price,quick delivery

Best phone case ever! This is my second one as I broke my first. Would defo recommend

Great fitting Apple Watch bands

For Apple Watch Ultra 3 / 2 / 1 49mm RedPepper Armor Metal Case Integrated Silicone Watch Band(Steel Black White)

Good price and quick postage

