
DIY Phone Screen Replacement: Step-by-Step Guide to Success
Fixing a cracked phone screen at home might sound risky, but DIY repairs are more popular than ever. In fact, over 60 percent of smartphone users have attempted some form of self-repair in the last year. The surprising part is that it is not just seasoned tech enthusiasts succeeding at this. Anyone with a calm approach and the right tools stands a real chance at a flawless fix.
Table of Contents
- Step 1: Gather Essential Tools And Materials
- Step 2: Power Off And Prepare Your Smartphone
- Step 3: Remove The Broken Screen Carefully
- Step 4: Install The New Screen Securely
- Step 5: Test The New Screen Functionality
- Step 6: Seal And Finalise The Repair
Quick Summary
| Key Point | Explanation |
|---|---|
| 1. Gather essential tools properly | Assemble precision screwdrivers, anti-static strap, and cleaning materials for effective screen replacement. |
| 2. Power off and backup data | Ensure the device is fully powered down and back up all important data to prevent loss during repairs. |
| 3. Remove the broken screen with care | Use heat and precise tools to gently detach the screen without damaging internal components. |
| 4. Install the new screen accurately | Align connectors correctly and apply adhesive to secure the new screen properly. |
| 5. Test functionalities thoroughly | Power on and conduct extensive checks on touch sensitivity and display quality after installation. |
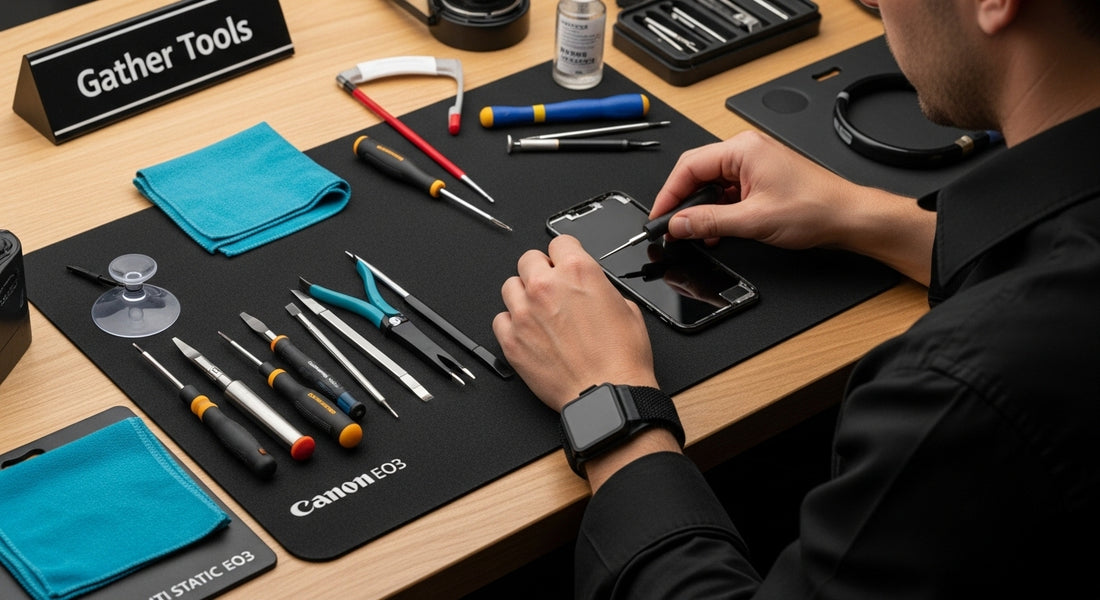
Step 1: Gather essential tools and materials
Successful DIY phone screen replacement begins with gathering the right tools and materials. Preparation is crucial to ensuring a smooth, efficient repair process. Before diving into the intricate world of smartphone screen replacement, you will need a comprehensive toolkit that supports precision and minimises potential damage.
For a professional grade DIY phone screen replacement, your toolkit should include several specialised instruments. Precision screwdrivers are absolutely fundamental, with specific sizes matching your smartphone’s unique screw configurations. Most modern smartphones require miniature Phillips head and Torx drivers. A high-quality anti-static wrist strap protects sensitive electronic components from potential electrostatic discharge, which can permanently damage internal circuits.
Your workspace requires specific protective equipment and supporting materials. Work on a clean, flat surface with good lighting, preferably using an anti-static mat to prevent electrical interference. Soft, lint-free microfibre cloths will help clean surfaces and handle delicate components without leaving residue. Isopropyl alcohol (at least 90% concentration) serves as an excellent cleaning solution for removing adhesive residues and preparing surfaces.
Key tools for your repair kit include:
- Plastic pry tools or spudgers for safely separating smartphone components
- Precision tweezers with non-conductive tips
- Suction cup for lifting screen assemblies
- Heat gun or hairdryer for carefully warming adhesive
- Magnetic screw tray to prevent losing tiny fasteners
- High-quality replacement screen appropriate to your specific smartphone model
Before commencing the repair, verify the compatibility of your replacement screen with your exact smartphone model and generation. Purchasing from reputable suppliers ensures you receive components matching original manufacturer specifications. iFixit recommends carefully cross-referencing model numbers and checking connector types to guarantee perfect fitment.
Lastly, psychological preparation is as important as physical tools. Approach the repair methodically, take your time, and maintain a calm, focused mindset. Creating a workspace free from distractions and having patience will significantly improve your chances of a successful screen replacement.
Below is a summary table of essential tools and materials required for a successful DIY phone screen replacement, including their purpose and any important notes.
| Tool/Material | Purpose | Notes |
|---|---|---|
| Precision screwdrivers | Remove specific screws from smartphone | Phillips and Torx sizes common; match device’s screw configuration |
| Anti-static wrist strap | Prevent static discharge damage to electronics | Wear throughout repair for safety |
| Plastic pry tools / spudgers | Separate components and lift screen safely | Avoid metal tools to minimise internal damage |
| Tweezers (non-conductive) | Handle delicate internal cables/connectors | Precision tips recommended |
| Suction cup | Assist in lifting display assemblies | Useful for initial screen separation |
| Heat gun or hairdryer | Loosen adhesive bonds around screen | Use low heat and controlled movement |
| Magnetic screw tray | Organise and prevent loss of tiny screws | Keeps small parts secure during disassembly |
| Microfibre cloths | Clean surfaces and components | Prevents scratches, leaves no residue |
| Isopropyl alcohol (90%+) | Clean adhesive residue and prepare surfaces | Use lint-free cloths for application |
| Replacement screen | Replace cracked or broken display | Confirm compatibility with exact smartphone model |
| Anti-static mat (for workspace) | Reduce risk of static affecting electronics | Optional but recommended for extra safety |
Step 2: Power off and prepare your smartphone
Preparing your smartphone for screen replacement requires meticulous attention to detail and systematic precautions. This critical stage involves more than simply turning off your device; it demands comprehensive preparation to safeguard your smartphone’s internal components and ensure a smooth repair process.
Begin by performing a complete device shutdown. Unlike standard powering off, you want to completely disconnect all electrical connections. For most smartphones, this means holding the power button and selecting the full shutdown option. If your device is unresponsive, remove the battery if possible, or perform a hard reset by holding power and volume buttons simultaneously for 10-15 seconds.
Data protection becomes paramount during smartphone repairs. Before proceeding, backup all critical information using cloud services or computer synchronisation. While screen replacement should not theoretically compromise data, unexpected complications can arise. Synchronise contacts, photographs, messages, and application data to prevent potential loss. Cloud platforms like Google Drive or iCloud offer seamless backup solutions that can be completed within minutes.
Prepare a clean, well-illuminated workspace with ample room to organise your tools and device components. Static electricity poses a significant risk to electronic circuits, so work on a non-conductive surface. National Institute of Standards and Technology recommends using anti-static mats and wearing grounded wrist straps to minimise potential electronic damage.
Key preparation steps include:
- Removing any smartphone case or protective covering
- Disconnecting external accessories
- Ensuring workspace is clean and free from potential contaminants
- Having soft, lint-free cloths nearby for component handling
Inspect your smartphone thoroughly before beginning the screen replacement. Look for existing damage, water indicators, or signs of previous tampering. Document the device’s current condition with photographs. This documentation can protect you if unexpected issues emerge during the repair process.
Some warranty considerations and repair services require comprehensive photographic evidence of the smartphone’s pre-repair state.
Finally, verify your device is completely powered down and discharged. A smartphone with residual electrical charge can cause short circuits or unexpected behaviour during screen replacement. Wait at least 5-10 minutes after shutdown to ensure complete electrical discharge before commencing the repair process.
This checklist table helps ensure you have properly completed all smartphone preparation steps before starting your screen replacement.
| Preparation Step | Completion Criteria |
|---|---|
| Perform complete shutdown | Device is fully powered down (not just in sleep or standby mode) |
| Backup all critical data | Data successfully saved to cloud or computer; contacts, photos, and apps synchronised |
| Remove phone case and accessories | No protective case or external accessories attached |
| Ensure clean, well-lit workspace | Surface is clear, well-illuminated, and free of contaminants |
| Apply anti-static safety measures | Anti-static mat and/or wrist strap in use |
| Document device condition | Photographs taken of device exterior and internal state |
| Verify no residual charge | Waited at least 5–10 minutes post-shutdown; all indicator lights are off |
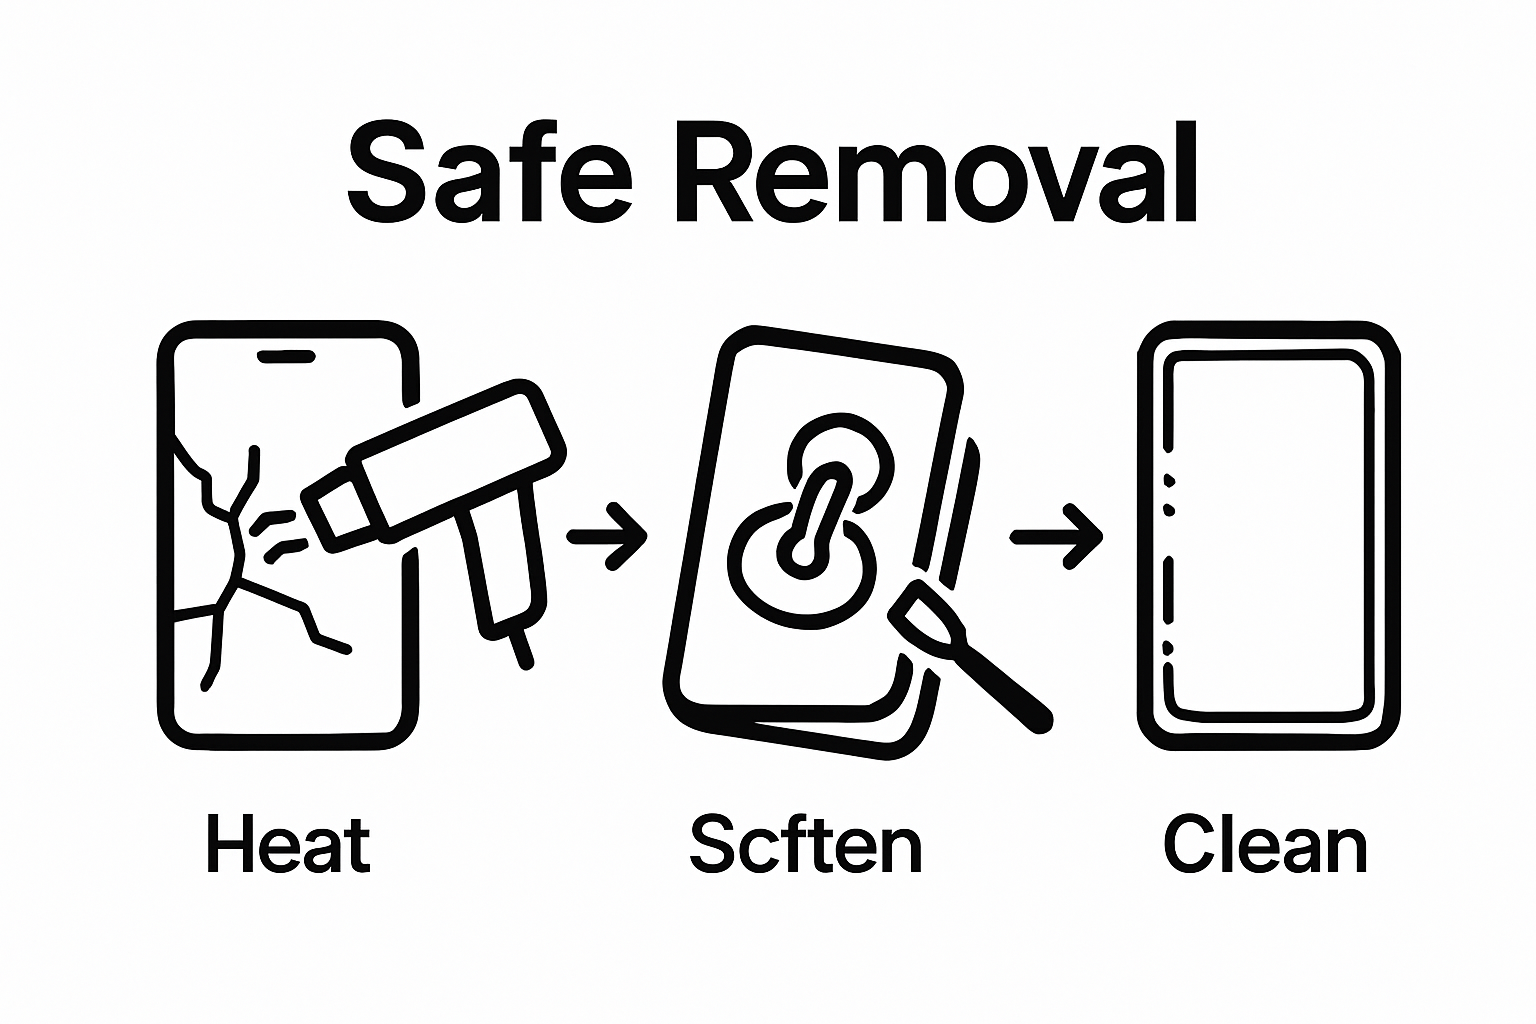
Step 3: Remove the broken screen carefully
Removing a damaged smartphone screen requires precision, patience, and methodical technique. This critical stage determines the success of your entire repair process, demanding careful manipulation to prevent additional damage to internal components. Understanding the delicate nature of smartphone assemblies will guide your approach and minimise potential complications.
Begin by identifying the specific type of screen attachment mechanism. Modern smartphones typically use strong adhesive or carefully positioned clips and screws. Heat application becomes crucial in loosening adhesive bonds without causing thermal damage. Using a heat gun or hairdryer set to low temperature, gently warm the screen edges for 30-45 seconds. This softens the adhesive, making separation significantly easier. Exercise extreme caution to maintain consistent, moderate heat and avoid concentrating warmth on a single spot.
Precision tools are essential for safe screen removal. Plastic pry tools or spudgers designed specifically for smartphone disassembly will help separate the screen without scratching or damaging underlying components. Avoid using metal tools or excessive force, which can compromise the device’s internal circuitry. Start at a corner with minimal resistance, typically near the charging port or home button area. Apply gentle, consistent pressure while slowly working the tool around the screen’s perimeter.
Key considerations during screen removal include:
- Maintaining even pressure throughout the separation process
- Keeping tools at a shallow angle to prevent internal component damage
- Watching for connector cables still attached to the screen assembly
- Moving systematically around the screen’s edges
iFixit recommends documenting your disassembly process with photographs. These images serve as a valuable reference when reassembling the device and can help identify specific connection points or unique device characteristics.
As you progressively separate the screen, you will encounter ribbon cables connecting the display to the smartphone’s motherboard. Disconnect these cables with extreme care. Use tweezers if necessary, but apply minimal pressure. Some devices require specific unlocking mechanisms or gentle lifting techniques to safely detach these delicate connectors.
Once the screen is fully separated, place it on a clean, static-free surface. Inspect the device’s frame for any remaining adhesive residue or damage. Clean the surface gently with isopropyl alcohol and a lint-free cloth, preparing the smartphone for the new screen installation.
 Verify that no internal components have been disturbed during the removal process, setting the stage for a successful screen replacement.
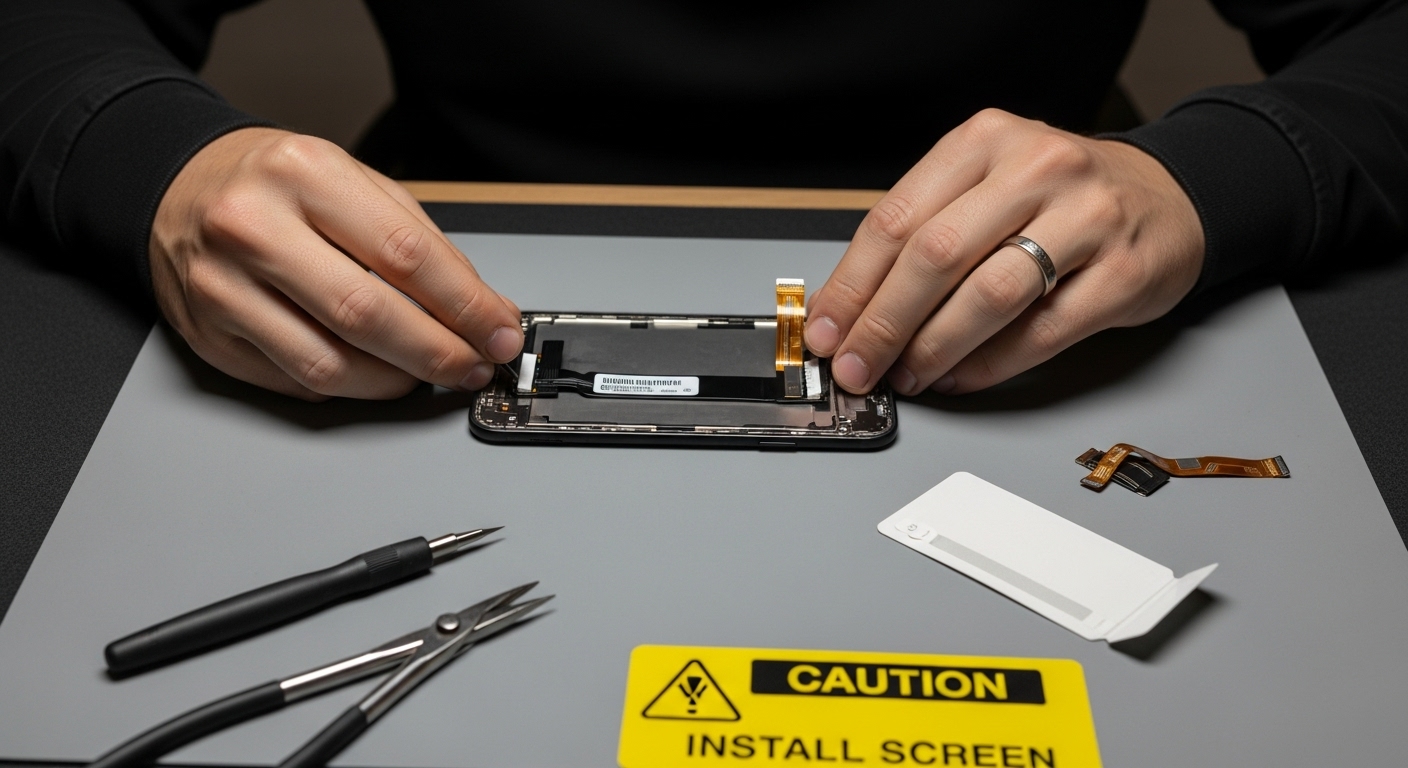
Step 4: Install the new screen securely
Installing a new smartphone screen represents the most pivotal moment in your DIY repair journey. Precision and patience are paramount during this intricate process, where every movement can determine the success of your screen replacement. Your careful preparation in previous steps now converges into this critical installation phase.
Begin by thoroughly cleaning the smartphone’s internal frame using high-concentration isopropyl alcohol and a lint-free microfibre cloth. Remove any residual adhesive or debris from the previous screen, ensuring a pristine surface for the new screen assembly. Any microscopic particles can compromise the screen’s alignment or create potential future issues with touch responsiveness or seal integrity.
Aligning the new screen requires meticulous attention. Connector positioning is absolutely crucial. Carefully examine the replacement screen’s ribbon cables and compare them precisely with the original device’s connection points. Some smartphone models have specific orientation requirements, and forcing connections can cause irreparable damage. Gently guide the ribbon cables into their respective sockets, applying minimal pressure and ensuring they’re seated correctly.
Key installation steps include:
- Verifying connector compatibility
- Checking ribbon cable orientation
- Applying even, consistent pressure during attachment
- Avoiding static electricity exposure
Repair experts at iFixit recommend using a soft plastic spudger to carefully secure connector points. Press down gently but firmly, watching for subtle signs of proper seating. Some screens will make a slight clicking sound or show a nearly imperceptible levelling when correctly installed.
Adhesive application requires strategic precision. Modern smartphones typically use pre-cut adhesive strips or liquid adhesive. If using liquid adhesive, apply a thin, consistent layer around the smartphone’s frame. Avoid excessive amounts that could seep into internal components. Allow the adhesive to become slightly tacky before positioning the screen, which helps create a more secure bond.
Once positioned, apply gentle, even pressure across the entire screen perimeter. Use soft, clean cloths to distribute pressure and remove any potential air bubbles. A systematic approach involves starting from the centre and working outwards, ensuring complete and uniform attachment. Resist the temptation to rush this process, as hasty installation can lead to misalignment or incomplete bonding.
Finally, allow the newly installed screen to settle. If possible, leave the smartphone in a stable, room-temperature environment for several hours before powering on. This waiting period allows adhesives to cure properly and minimises potential complications during the initial device reactivation.
Step 5: Test the new screen functionality
The moment of truth in any smartphone screen replacement arrives with comprehensive functionality testing. This critical stage determines whether your repair has successfully restored the device to its full operational capacity. Approach this phase systematically, examining multiple aspects of screen performance and device responsiveness.
Initial boot-up represents your first diagnostic opportunity. Power on the smartphone and observe the startup sequence carefully. Watch for any unusual behaviours such as irregular colour displays, flickering, or incomplete screen illumination. Pay close attention to the device’s responsiveness during the boot process. A properly installed screen should initialise smoothly, displaying clear, crisp graphics without distortion or visible damage.
Touch sensitivity testing becomes paramount in verifying screen quality. Navigate through various interface elements, testing different touch interactions. Perform comprehensive touch tests by engaging multiple areas of the screen simultaneously. Swipe, pinch, zoom, and tap across different regions to ensure uniform responsiveness. Check edge sensitivity, corner responsiveness, and overall touch accuracy. Any dead zones or inconsistent touch recognition might indicate improper installation or connector issues.
Key functionality verification steps include:
- Testing all screen brightness levels
- Checking colour accuracy and display uniformity
- Verifying multi-touch capabilities
- Examining screen rotation and orientation sensors
DisplayMate recommends running comprehensive display diagnostics that evaluate colour reproduction, contrast ratios, and pixel performance. Utilise built-in smartphone diagnostic tools or download specialised screen testing applications that can provide detailed technical assessments of your newly installed display.
Beyond physical touch interactions, examine the screen’s performance under different lighting conditions. Test the display outdoors, indoors, and under varied brightness settings. Observe colour consistency and screen clarity from multiple viewing angles. Inspect for any light bleed, uneven illumination, or colour temperature variations that might suggest installation irregularities.
Connection stability represents another crucial testing parameter. Ensure all device functions seamlessly integrate with the new screen. Test camera preview, video playback, gaming performance, and application responsiveness. Any subtle lag or graphical glitches could indicate underlying connection problems that require immediate attention.
Document your testing process meticulously. Take screenshots, record video demonstrations of screen performance, and note any observed anomalies. This documentation serves two purposes: it provides a record of your repair process and creates a baseline for future reference should additional issues emerge. Patience and thorough testing are your best tools in confirming a successful smartphone screen replacement.
Step 6: Seal and finalise the repair
Sealing and finalising your smartphone screen repair represents the culmination of your meticulous work. This crucial stage transforms your carefully executed repair into a professionally finished device, ensuring long-term durability and aesthetic integrity. Precision during this final phase will determine the overall quality and longevity of your screen replacement.
Frame preparation becomes essential before final assembly. Inspect the smartphone’s frame thoroughly, removing any residual adhesive fragments or microscopic debris using isopropyl alcohol and a lint-free microfibre cloth. Create a pristine surface that will allow optimal bonding for any protective elements or additional sealing mechanisms. Pay extraordinary attention to the edges and corners, where precise cleaning can prevent future moisture or dust infiltration.
If your smartphone model requires additional structural reinforcement, consider applying professional-grade adhesive strips around the screen’s perimeter. These specialised strips provide uniform pressure and create a water-resistant seal. Apply them systematically, starting from one corner and working methodically around the entire frame. Ensure consistent pressure and alignment, avoiding air bubbles or uneven adhesion that could compromise the screen’s structural integrity.
Key finalisation steps include:
- Checking all screw holes and mounting points
- Verifying no loose components remain
- Ensuring complete electrical connector seating
- Cleaning exterior surfaces thoroughly
Repair experts at iFixit recommend using specialised sealing techniques that match your specific smartphone model. Some devices require particular attention to waterproofing elements or specific mounting techniques that vary between manufacturers.
Cosmetic refinement represents the final touch in your repair process. Carefully wipe down the entire device using microfibre cloths, removing any fingerprints, adhesive residue, or potential contaminants. If your replacement screen includes a pre-installed screen protector, verify its alignment and smoothness. For additional protection, consider applying a high-quality tempered glass screen protector that complements your newly installed screen.
Before considering the repair complete, perform a final comprehensive functionality test. Cycle through various applications, test touch responsiveness across different screen regions, and verify that all sensors and components function correctly. Document the repair process with photographs, noting the date and specific steps taken. This documentation can prove invaluable for future reference or potential warranty considerations.
Reassemble any additional components like cases or protective covers, ensuring they fit correctly with the new screen. Your smartphone is now ready to serve you with renewed display quality and restored functionality.
Bring Your DIY Repair Project to Life with Premium Parts from Buy2fix
You have followed the critical steps of screen replacement with patience and care, but finding reliable replacement components and tools can be a challenge. Low-quality parts, compatibility concerns and the need for trustworthy suppliers often add unwanted frustration to any DIY success. At Buy2fix, you will discover a professional solution to every pain point described in your guide.
Explore a massive range of genuine and premium-quality phone repair parts to match your hard-earned repair skills. Whether you need a precise replacement screen, essential flex cables or a new set of screwdrivers, we offer guaranteed compatibility across major models. Enjoy free UK Mainland shipping, comprehensive warranties and rigorous part testing without the uncertainty of questionable online sellers. Ready to complete your phone repair with lasting results? Visit the official Buy2fix landing page now to equip yourself for your next screen replacement and keep your device looking and working as good as new.
Frequently Asked Questions
What tools are essential for a DIY phone screen replacement?
To successfully replace a phone screen, you will need precision screwdrivers, an anti-static wrist strap, plastic pry tools, tweezers, a suction cup, a heat gun or hairdryer, and a high-quality replacement screen compatible with your device.
How do I prepare my smartphone for screen replacement?
Before starting the replacement, power off the device completely, back up all critical information, remove any protective covering or smartphone case, and ensure your workspace is clean and free from contaminants. Using an anti-static mat can help protect sensitive electronic components.
What steps should I take to safely remove a damaged screen?
Begin by applying heat to soften the adhesive, then use plastic pry tools to carefully separate the screen. Make sure to keep a shallow angle with your tools to avoid damaging internal components and disconnect any ribbon cables with care.
How do I ensure the new screen is installed correctly?
Clean the smartphone’s internal frame, align the new screen carefully with the connector points, and ensure proper adhesive application. Press down evenly across the screen’s perimeter, and allow the adhesive to cure before powering the device back on.
Recommended
- Front Screen Outer Glass Lens with OCA Optically Clear Adhesive for Xi – buy2fix
- Front Screen Outer Glass Lens with OCA Optically Clear Adhesive for Xi – buy2fix
- Front Screen Outer Glass Lens with OCA Optically Clear Adhesive for Xi – buy2fix
- For OPPO R17 / R17 Pro Front Screen Outer Glass Lens with OCA Opticall – buy2fix
Let customers speak for us
For Samsung Galaxy A26 SM-A266B Original Earpiece Speaker with Cable

Very good communication throught. Good product

Well made part very strong easy to fit great value for the money

Well packed, with fast shipping :)

Exactly what the doctor ordered…great color, comfort, and durability. Trust this watch band!

Brilliant strap, second purchase, bought bracelet before. Excellent value. Thank you

Great item for splitting your Audio signal

Outstanding product!
Next level customer service.

Very satisfied but the delivery needs to get more faster...

Good price,quick delivery

Best phone case ever! This is my second one as I broke my first. Would defo recommend

Great fitting Apple Watch bands

For Apple Watch Ultra 3 / 2 / 1 49mm RedPepper Armor Metal Case Integrated Silicone Watch Band(Steel Black White)

Good price and quick postage

